
Plaster Wall Art: Gorgeous Look or Costly Mistake?
Plain walls can feel boring. If you want a fresh, modern look without spending a fortune, plaster wall art might be the answer. It is one of the hottest home decor trends right now.
This style uses simple materials like limewash, gypsum, or joint compound. You spread them on canvas or wood panels to create soft, textured shapes. The result looks like something from a high-end gallery.
In this article, we will explain everything about plaster wall art. You will learn what it is, why people love it, how to make it, and what it may cost.
Want to bring more earthy warmth into your home? Check out our guide to 7 Stunning Earthy Minimalist Living Room Ideas.
What Is Plaster Wall Art?
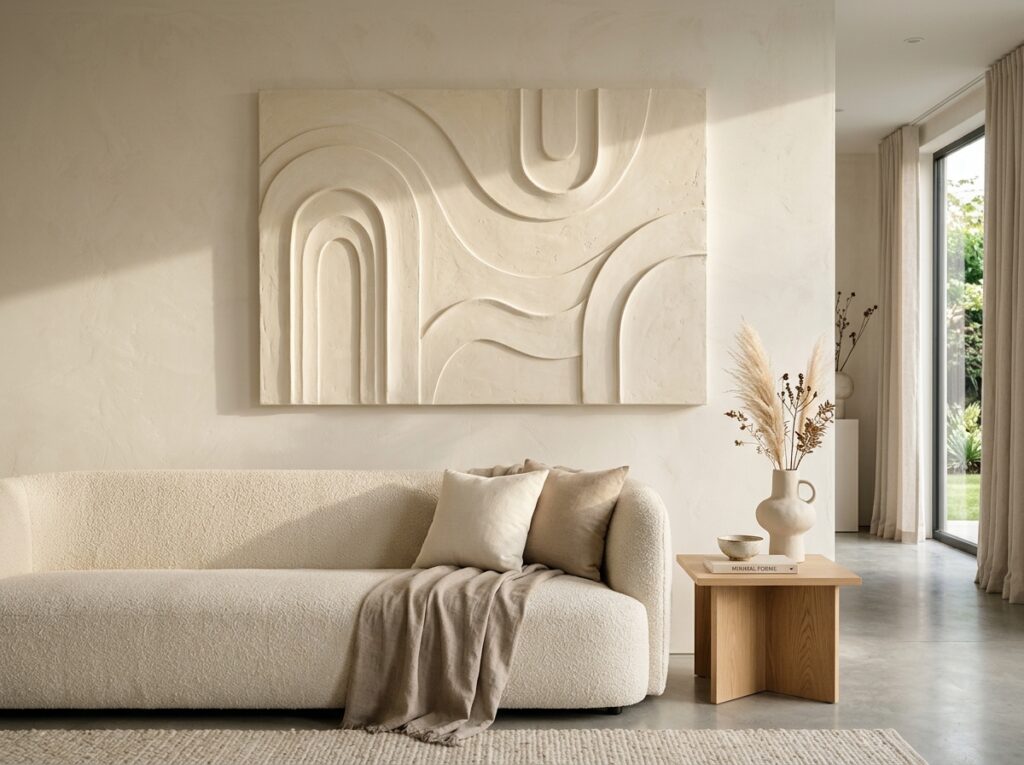
Plaster wall art is a type of textured decor. Artists coat a flat surface with plaster-like material. Then they shape it into arches, waves, or geometric lines.
The finish is usually soft and matte. It is not shiny like paint. Instead, it has real depth. Shadows fall across the bumps and curves throughout the day.
This is why plaster wall art feels alive. It changes look with the sunlight. Morning light and evening light both create different moods on the same piece.
Why Plaster Wall Art Is Trending Now
People are moving away from busy, loud decor. Calm and minimal spaces are in fashion. This is where plaster wall art fits perfectly.
It matches two very popular design styles:
- Japandi – a mix of Japanese and Scandinavian style, focused on calm and simplicity
- Scandinavian – known for light colors, natural texture, and clean lines
Both styles love natural materials and soft shapes. It gives an exact feeling. It looks expensive, but it does not have to be.
Materials Used
You do not need rare or fancy items. Most materials are easy to find at any hardware store.
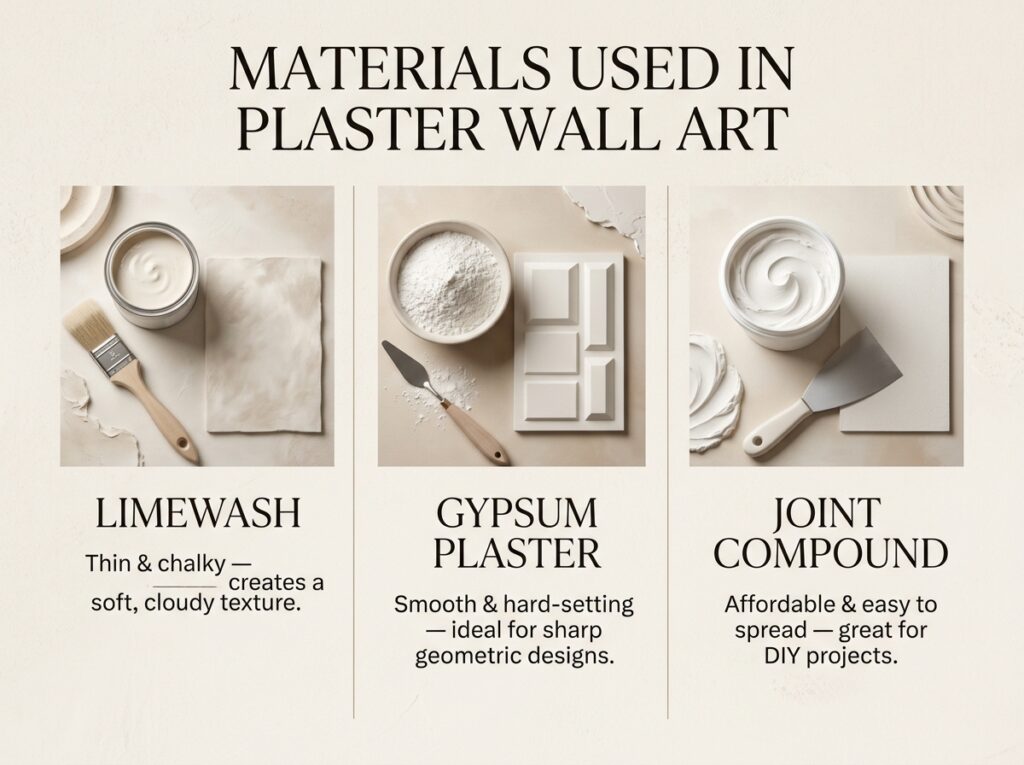
1. Limewash
Limewash is a thin, chalky paint. It creates a soft, cloudy texture on walls or panels.
2. Gypsum Plaster
Gypsum is smoother and dries harder. It is great for sharp geometric shapes.
3. Joint Compound
This is the cheapest option. Many DIY lovers use joint compound because it spreads easily and dries fast.
Ready to upgrade your coffee corner? Discover these creative Coffee Station Ideas for a stylish and inviting setup.
Tools You Will Need
Before starting your plaster wall art project, gather these basic tools:
- A wide putty knife or trowel
- Sandpaper (fine grit)
- A canvas or wood panel
- Painter’s tape for clean lines
- A sealer or matte varnish
Step-by-Step: How to Make Your Own Plaster Wall Art
Making this wall art at home is simpler than it looks. Follow these steps carefully.
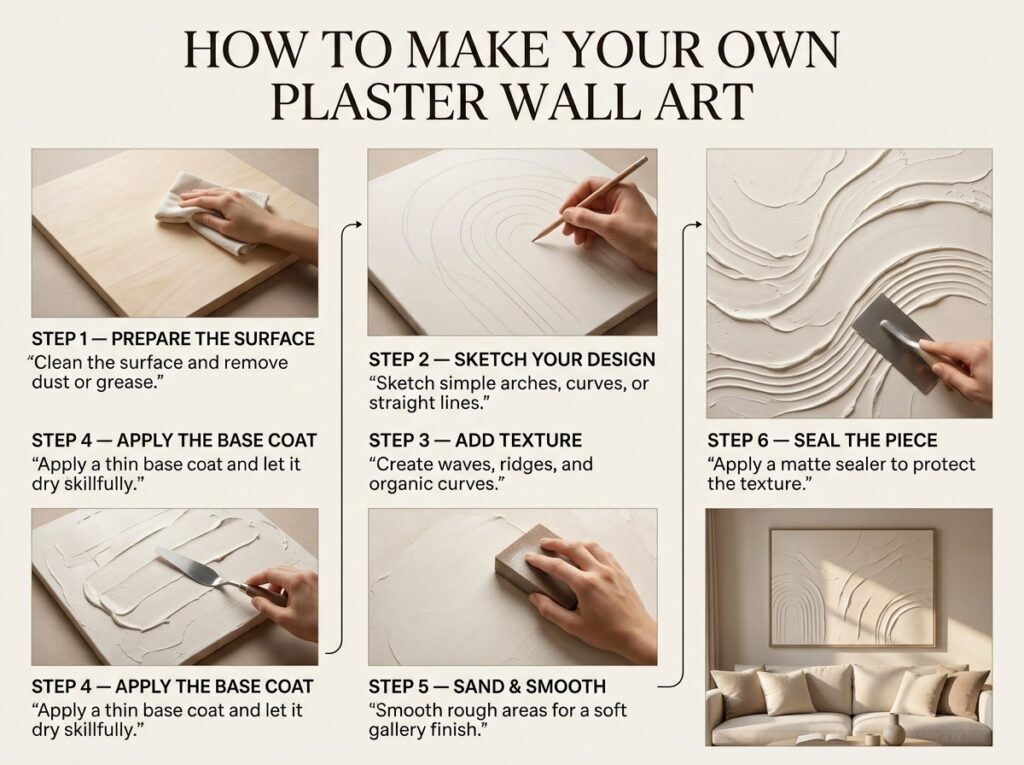
Step 1: Prepare the surface Clean your canvas or wood panel. Remove any dust or grease before applying material.
Step 2: Sketch your design Use light pencil marks. Simple arches or straight lines work best for beginners.
Step 3: Apply the base coat Spread a thin layer of joint compound or gypsum. Let it dry fully before adding texture.
Step 4: Add texture Use your trowel to create waves, ridges, or soft curves. This is where your art gets its character.
Step 5: Sand and smooth Once dry, gently sand rough spots. This gives a soft, gallery-style finish.
Step 6: Seal the piece Apply a matte sealer. This protects your wall art and keeps the texture intact for years.
The right color can completely change your dining room’s mood. Discover these Dining Room Color Ideas for a stylish, welcoming space.
Cost Comparison Table
Here is a simple comparison to help you plan your budget for wall art.
| Material | Average Cost | Difficulty | Best For |
| Limewash | $ | Easy | Soft, cloudy texture |
| Gypsum Plaster | $$ | Medium | Sharp, clean shapes |
| Joint Compound | $ | Easy | Budget beginners |
| Professional-made piece | $$$$ | N/A | Ready-made luxury look |
As you can see, DIY art is far cheaper than buying gallery pieces. You can save hundreds of dollars.
Benefits of Plaster Wall Art
There are many reasons homeowners are choosing this type of art over regular paintings.
- Budget-friendly – costs much less than framed art
- Customizable – you control size, shape, and texture
- Timeless look – fits both modern and rustic homes
- Natural material feel – no plastic or glossy finish
- Shadow play – changes appearance with light
Common Mistakes to Avoid
Even simple projects can go wrong. Watch out for these issues with this wall art.
- Applying material too thick, which can crack while drying
- Skipping the sealing step, which weakens durability
- Rushing the drying time between layers
- Using low-quality tools, which ruins smooth texture
Take your time. Plaster wall art rewards patience, not speed.
Where to Place Plaster Wall Art in Your Home
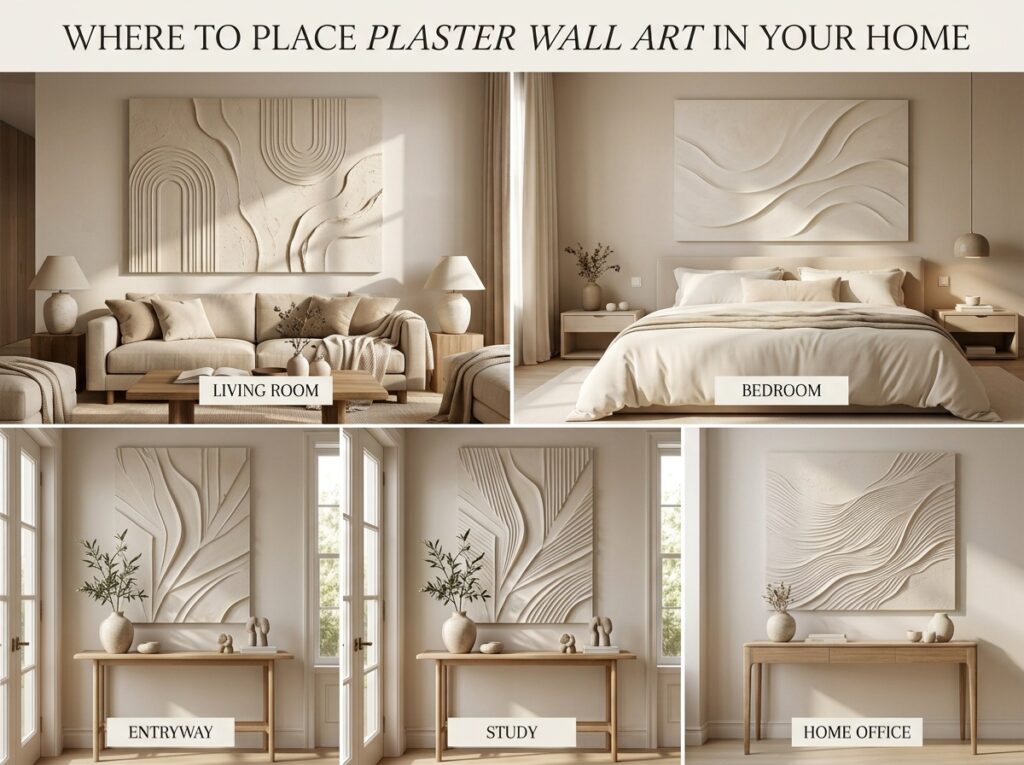
This decor style works in almost any room. But some spots shine more than others.
- Living room – above the sofa as a bold focal point
- Bedroom – behind the headboard for a calm mood
- Entryway – first impression piece near the front door
- Home office – adds texture without distraction
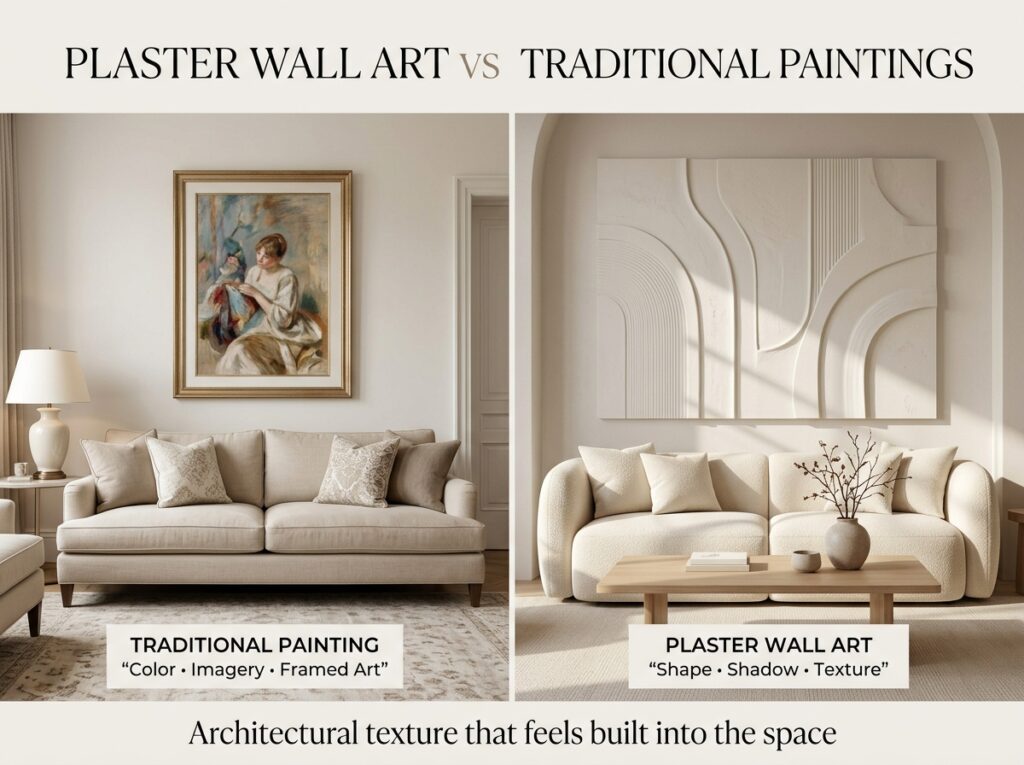
Plaster Wall Art vs Traditional Paintings
Traditional paintings use color and image to grab attention. Plaster wall art uses shape, shadow, and touch instead.
Many designers say plaster wall art feels more “architectural.” It looks like part of the building, not just decoration hung on top.
This is exactly why it suits Japandi and Scandinavian homes so well. Those styles love things that feel built-in and natural.
Is Plaster Wall Art Durable?
Yes, when done correctly. Gypsum and joint compound both dry very hard. A good sealer adds extra protection.
However, plaster wall art can crack if it is bumped hard or made too thick. Handle finished panels gently, especially during moving.
FAQs About Plaster Wall Art
Q1: Is plaster wall art expensive to make at home? No. Basic joint compound costs very little. Most DIY plaster wall art projects cost under $30.
Q2: How long does plaster wall art take to dry? It depends on thickness. Thin layers dry in a few hours. Thick layers may need 24 to 48 hours.
Q3: Can beginners make plaster wall art? Yes. Simple designs like straight lines or soft arches are beginner-friendly.
Q4: Does plaster wall art work in small apartments? Yes. Smaller panels look great in tight spaces and add texture without feeling heavy.
Q5: What is the best material for beginners? Joint compound is the easiest. It is cheap, forgiving, and simple to smooth out.
Q6: Can I paint over plaster wall art? Yes, but many people prefer the natural raw color for that gallery look.
Final Thoughts
Plaster wall art gives your home a calm, high-end feel without a high-end price. It fits perfectly into Japandi and Scandinavian spaces.
With just a few tools and some patience, you can create your own plaster wall art at home. Start small, take your time, and let natural light do the rest.
Your walls deserve more than plain paint. Give them texture, shadow, and story with plaster wall art.
[…] Thinking about adding texture to your walls? Check out our guide, [Plaster Wall Art: Gorgeous Look or Costly Mistake?], before you make the leap. […]